Managing locations (Location)
A Location represents a physical site — a store, restaurant, office, or branch. Each Location belongs to an Organization and holds a list of Cameras synced from the VMS via a device code.
Prerequisites
- You have at least one Organization — see Managing organizations.
- You have the VMS device code (Box ID) for the location you're adding.
Viewing the location list
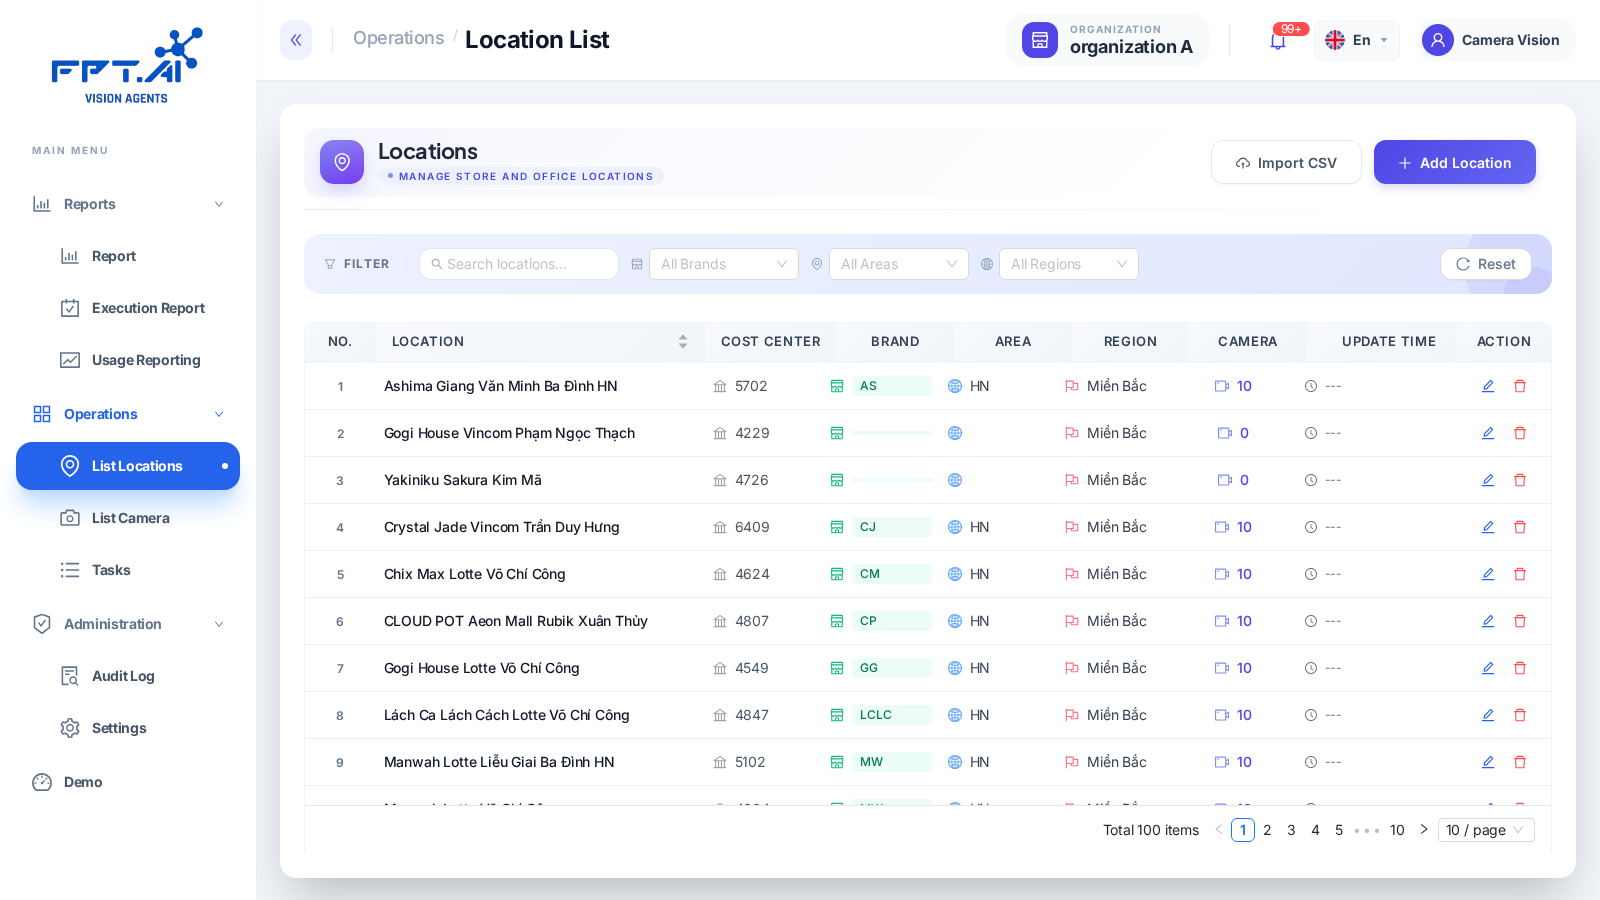
The list page supports pagination, search, and filtering by: organization, keyword, cost center code, brand, area, region, and status.
Use the Search box to find a location by name — results are sorted by best match.
Creating a new location
- Choose the target organization.
- Click Add Location.
- Fill in the details:
| Field | Required | Description |
|---|---|---|
| Location name | Yes | Display name |
| VMS device code | Yes | The code that links to the video management system, used to sync the camera list |
| Cost center code | No | — |
| Brand | No | — |
| Area | No | — |
| Region | No | — |
- Click Save.
When you create a location, the system automatically calls the VMS API with the device code to fetch the camera list, then creates the corresponding Camera records. Camera names are auto-generated in the format: location name - date - camera sequence number.
Confirm: reopen the location you just created and check that the camera list has synced — see Managing cameras.
Bulk import via CSV
Use this when you need to create or update several locations at once.
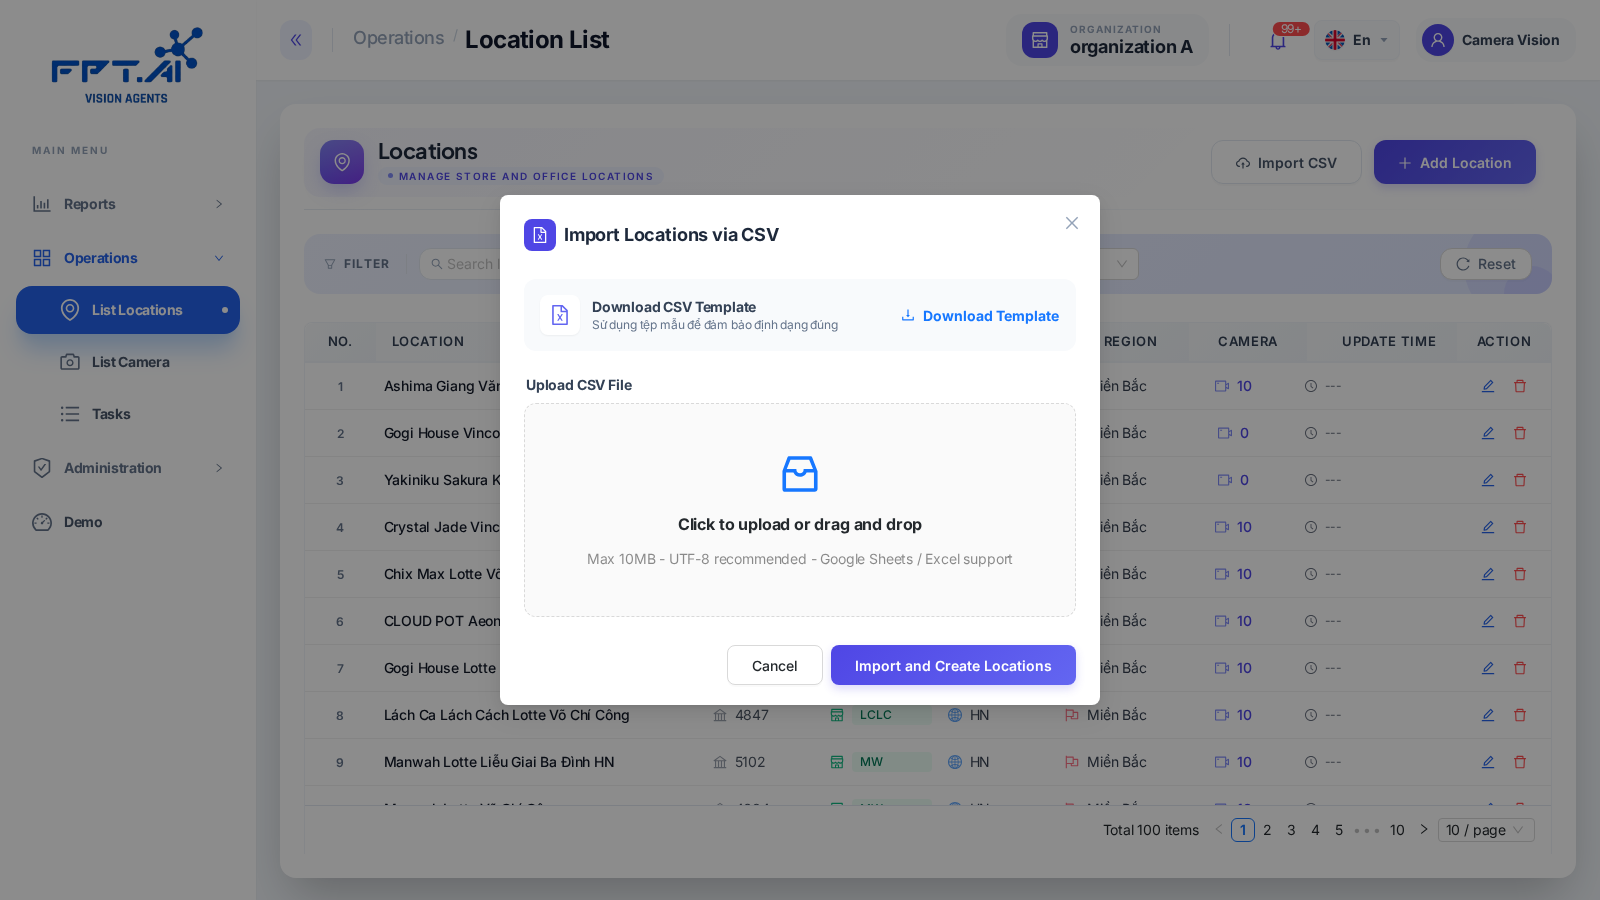
The real button on the Portal is named "Import CSV". The dialog has a Download Template button to get the sample file, a drag-and-drop/click area to choose a file (10MB limit, UTF-8 recommended, Google Sheets/Excel export supported), and an Import and Create Locations button to confirm. No separate "choose target organization" step was found inside this dialog — the organization is likely taken from whichever one is currently selected in the top bar instead.
- Click Import CSV.
- (Recommended) Click Download Template to get the correctly formatted sample file.
- Drag-and-drop or click to choose your CSV file (up to 10MB, UTF-8 recommended, exports from Google Sheets/Excel supported).
- Click Import and Create Locations.
- The system processes each row: an existing VMS device code → updates the matching location; a new one → creates it. For every row, the system syncs cameras from the VMS.
CSV file format
| Column | Required | Description |
|---|---|---|
| Location name | Yes | — |
| VMS device code | Yes | — |
| Cost center code | No | — |
| Brand | No | — |
| Area | No | — |
| Region | No | — |
- The file must have a header matching the sample format. Location name and VMS device code are required.
- The file must be UTF-8 encoded.
- Rows missing a location name or VMS device code are skipped and logged as errors.
After import, the system returns: total rows processed, number created, number updated, number of errors (with details), cameras added, and cameras deactivated.
Refreshing cameras
Use this when the camera list on the VMS has changed (cameras added/removed) and you need to resync it for existing locations.
- Click Refresh Cameras.
- Choose an organization (optional) or leave it blank to refresh all.
- The system calls the VMS API for every location that has a device code: new cameras appear as new records; cameras no longer in the VMS are marked inactive.
Cameras no longer in the VMS list are set to inactive rather than deleted, to preserve event data and reports that reference them.
Editing a location
- Choose the location to edit.
- Click Edit.
- Update the fields you need (name, VMS device code, cost center code, brand, area, region, status).
- Click Save.
Changing the VMS device code resyncs the camera list — existing cameras are updated or replaced.
Deleting a location
- Choose the location to delete.
- Click Delete and confirm.
Make sure there are no active cameras or running Task AI at this location before deleting it.