Managing cameras
Cameras are the core building block of Vision Agents. Each Camera belongs to a Location and can have multiple Task AI assigned to it for video analysis. The camera management page lets you view the list, monitor status, capture screenshots, configure ROI zones, and assign AI tasks.
Prerequisites
- The camera has been synced into a Location — see Managing locations.
Viewing the camera list
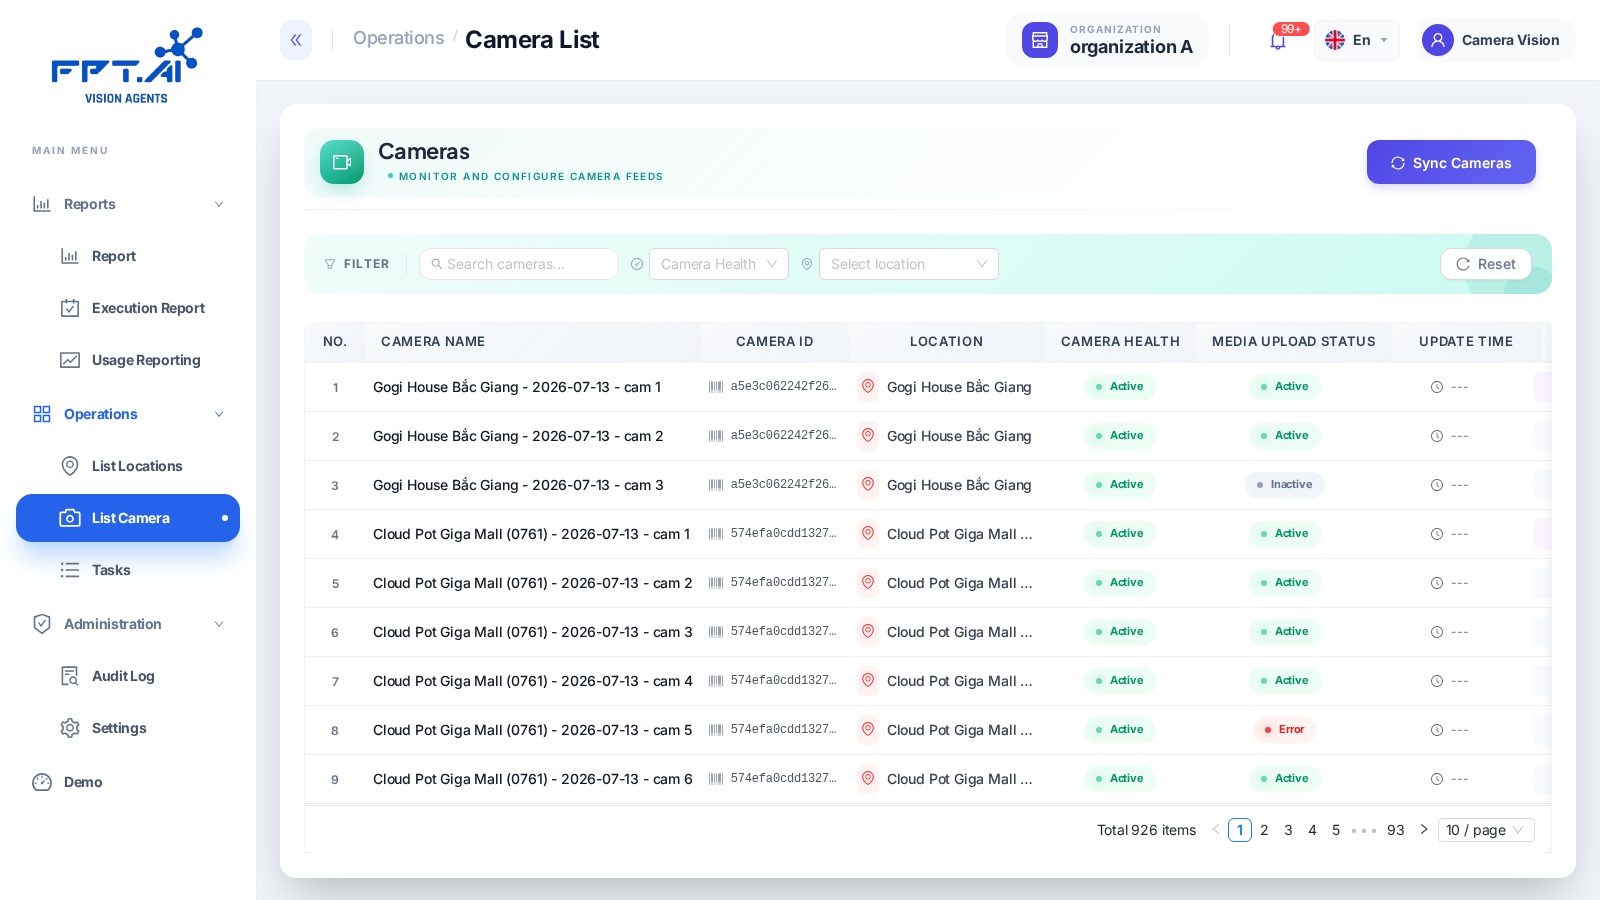
The list supports pagination and filtering by location and keyword, plus operational status (Camera Health). Each camera shows its device code (Camera ID), name, location, health status (Camera Health: Active/Inactive/Error), recording status (shown on the Portal as Media Upload Status: Active/Inactive), last update time, and number of assigned tasks.
Monitoring camera status
A camera has two states: Active (present in the VMS device list) and Inactive (deactivated, no longer in the VMS, or manually disabled).
The system runs periodic camera health diagnostics; results include a status (normal/has an issue), scan time, and an error code and description if there's an issue. See Camera diagnostics for error code details.
When a camera is in a problem state, the system automatically looks up the most recent alert from the diagnostic task to provide detail on the cause.
Capturing screenshots
Stored screenshot
- Choose the camera to update.
- Click Update Screenshot.
- Choose or capture an image.
- The system uploads the image to storage and saves the path to the camera's info.
This image is used as the background when drawing ROI zones — see Configuring ROI zones.
Live screenshot
- Choose the camera.
- Click Capture Live Screenshot.
- Choose a source: Live stream (captures from the video currently playing) or Recorded video (captures from stored video, with an option to specify a time).
Recorded-video mode is useful when you want an image from a specific point in the past.
Assigning Task AI to a camera
Bulk assignment
- Choose the target cameras from the list.
- Click Assign Task.
- Choose a task and configure its parameters (schedule, threshold, etc.).
- Click Apply.
Updating or deleting a task configuration affects all cameras using that task. Check carefully before proceeding.
Configuring ROI zones
ROI (Region of Interest) limits the area the AI analyzes on the frame. Zone configuration is specific to each camera-task pair — changing a zone on one camera doesn't affect another camera even on the same task.
- Go to Operations → Tasks → find the task assigned to the camera you want to configure.
- Click the Zone Configuration icon (the target/aim icon) on that task's row.
- On the canvas showing the camera screenshot as background, switch between the ROI tab (area to analyze) and EXCLUSION tab (area to exclude), drawing the corresponding polygon.
- Click Save.
Each polygon needs at least 3 points. Coordinates use a frame-relative coordinate system; frame dimensions are stored alongside the ROI to ensure correct display later.
For detailed instructions and best practices by camera angle, see Configuring ROI zones.
Click Delete Zone to remove the configuration — the camera reverts to full-frame analysis.
You can also assign a Camera Label (e.g. "Entrance", "Exit") within the context of a specific task; this label appears in reports and events.
Searching for a camera
Use the search box to find a camera by name within an organization — results are sorted by match quality (fuzzy search).