Permissions Configuration
This document describes how to manage users and access permissions on the eKYC Portal. To access this page, log in to the eKYC Portal with an account that has the appropriate permissions, select EKYC settings in the left menu, then select the Permissions tab.
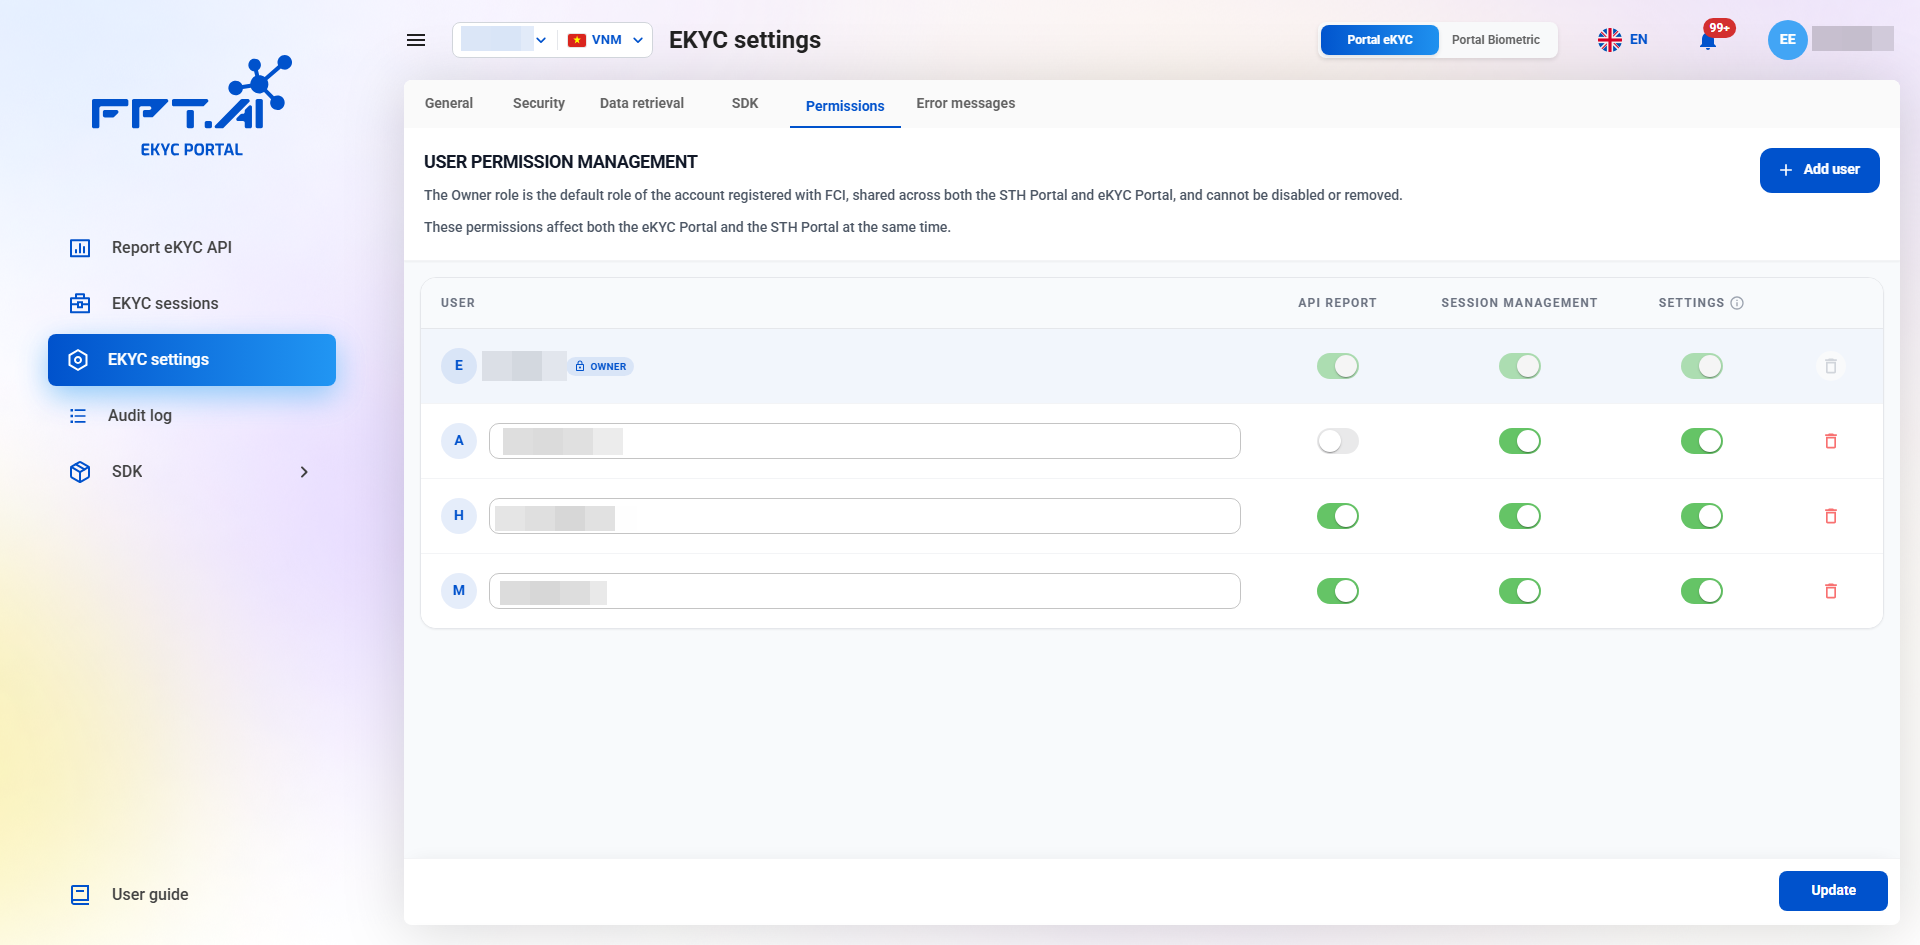
1. Overview
The Permissions tab allows administrators to specify exactly what each user can do on the eKYC Portal, instead of every user having the same full access.
Some points to note about the scope of permissions:
- A user's permissions only take effect within one specific project. If your account manages multiple projects, you need to configure permissions separately for each project.
- The same user can be granted different permissions in different projects — for example, all 3 permissions in project A, but only 1 permission in project B.
- After logging in to the Portal, users see the list of projects assigned to them and select one project to work in, with exactly the permissions configured for that project.
2. Three permission types
| Permission | Allows access to |
|---|---|
| API Report | View the overview and details of eKYC API reports (Report eKYC API menu) |
| Session Management | View the overview and details of each eKYC session (EKYC sessions menu) |
| Settings | Configure the eKYC Portal (EKYC settings menu, including the Permissions tab), configure the SDK (SDK menu), and view the Audit log |
Each user can be granted 1, 2, or all 3 permissions at the same time, with no limit on the number of permissions per user.
Note: if you also use the Biometric Portal, the permissions configured here affect both the eKYC Portal and the STH Portal at the same time, without any need to configure them again.
3. Default Owner account
The Owner is the default account registered with FPT.AI to create the initial project. The Owner row always appears at the top of the user list with an OWNER label. It is shared across both the Biometric Portal and the eKYC Portal, cannot be removed, and always has all 3 permissions enabled — none of the Owner's permissions can be turned off.
4. Adding and editing users
Any user who has the Settings permission can add, edit, or delete other users in the project (except the Owner row).
How to add a new user:
- Press Add user to add a new row to the table.
- Enter the user's email.
- Turn the corresponding permissions (API Report, Session Management, Settings) on or off for that user.
- Press Update to save.
How to edit the email of an existing user: click directly on the email field in the table to edit it.
Some notes when working on this page:
- If the email field is left blank, the Update button is disabled until you enter an email.
- The email you enter must not be the same as that of an existing user in the table.
- If you leave the page before pressing Update, unsaved changes will be lost.
- All permission changes are automatically recorded in the Audit log.
- If a user has been added to the project but has not been granted any permission, when they log in and select that project, they will see a message saying that they have not been granted permission and cannot access the project. The user still sees the project in the list, but cannot enter the Dashboard until they are granted at least 1 permission.